How to Remove the Smell of Smoke in a Room
How to Remove the Smell of Smoke in a Room
We have received several inquiries on how to get rid of cigarette smell in any room and so we thought a blog post should be written.
Here are some easy steps to follow to remove cigarette smell in your home.
Need something cleaned?
1. Regularly clean out ashtrays.
Believe it or not, the ashes and the cigarette butts are emitting smell long after you’ve made the last puff.
2. Deep clean any upholstery and carpet in your home because these materials easily absorb smoke and its smell stays for long.
A normal pat and vacuum cannot remove the smell entirely, you need to have a steam cleaner at least and then shampoo and conditioner specific for the upholstery fabric. This is why it’s better to call on a professional cleaning service to do this part for you.
3. Wipe the rest of the furniture in the room with a disinfectant or an odor eliminator solution.
Make sure you do not ruin the furniture with the solution you’re using.
4. Wipe the walls and the ceiling with a disinfectant or odor eliminator solution.
Mirrors and glass windows should be wiped clean too.
5. If you’re still planning on smoking in the room, make it a habit to open the windows to lessen the accumulation of the smoke.
Air out the room after smoking too. Proper ventilation is key.
6. Place charcoal on inconspicuous areas of the room.
Charcoal absorb any smell really well.
7. Spray room freshener, burn an incense, light a candle or put on air purifier to cleanse the air.
These could all work depending on the degree of odor you want to rid of.
What are the best homemade cleaning solution to use?
1. Vinegar works really well with proper amount of water added of course. I like using bleach with water too.
2. Store bought bleach and all purpose cleaning solutions should work too but you should be mindful of the surface area you are cleaning as it can damage wood or other surface.
3. For glasses and mirrors, you can use dishwashing liquid and water.
Here’s a bonus tip!
After washing/wiping your walls, floors and furniture with bleach or vinegar, do another set of wiping using the following: water plus your favorite fabric conditioner. This will leave the room smelling so nice and fresh without breaking the bank (and damaging anything!).
So there you go, I hope this post will help you in removing those pesky cigarette smell. If not, just call us we’ll make things easier (and smelling great!)
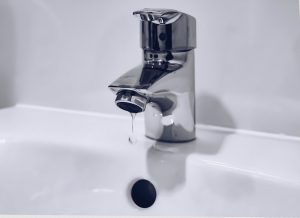 Those droplets and circular stains that you are mentioning are called “Hard Water Stains”, and are caused by the tap water that comes out of our faucet. Unfortunately, all our water supply provider delivers hard water through our pipelines. Hard water contains small amounts of metals and minerals, which when they accumulate and dry up, would cause those hard to remove stains. Simply put, regardless of what commercial cleaning solution you use, as long as you rinse using hard water, those marks will always appear. An immediate solution to this would be cleaning with the same cleaning solutions, soak it for 15 minutes, but rinsing with distilled water. On your next
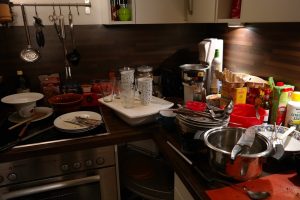 The kitchen sink and the counter tops or kitchen tables- that’s where it all starts. These are the usual areas we place our raw meats, vegetables and all other ingredients for thawing, cutting and other primary food processing. And no matter how clean you might think your source is, these raw food products have contaminants, like bacteria and viruses, that are too small to see and too few to be harmful.
 Another area which puts the cleaner in a difficult position, hence, hardly cleaned. Because of the weight of the refrigerator, the back is hardly cleaned, which makes dust accumulate, or pushed over dirt hide. But we are not just pointing out the space in between the “back” of the refrigerator and the wall it is leaning to, we are also pertaining to the section near the refrigerator motor. This area is a blank space where water can accumulate because of condensation, and where some bits of food can go to. This would be a problem area after a couple of years if you are using the regular type of refrigerators, not the no-frost or induction type. If you still have odor problems despite cleaning the inside of your ref, or despite placing blocks of charcoal or boxes of deodorizers, it would mean that the back of your refrigerator is really dirty.
 Sometimes it’s not the furniture, items or space that doesn’t give a spark in you, but it’s because of poor lighting in the area. And what better (and cheaper) way to do that than using natural lights. Check your drapes if they are out of place. You might have mixed up the drapes and instead of using block out curtains in your bedroom, you might have it in your living room. Play with your existing drapes to ensure that you can manage the sunlight coming in to your home where you want, when you want it.
 When was the last time you had your walls (re) painted, by you or a
  The floor is the most overlooked surface in the house when it comes to home improvement, but is as significant as placing a chandelier on your ceiling.
 Carpet cleaning is not just all about how cleaning and reconditioning your rug or carpet floors, but also in the drying. A lot of fancy carpet cleaning professionals and carpet extractors sales agent boast of fantastic and excellent cleaning service when in truth, they miss another important part of the process – drying. The usual process of shampooing or cleaning a carpet is either sucking all the dirt first or go right ahead with the carpet extractor, which sucks the dirt, at the same time sends a jet of water with shampoo cleaning solutions. That is all well and good, but after that process, it leaves the carpet wet (or worse, soaking wet). The crew might place a blower to dry the carpet, but it will only dry up the surface, giving it an impression that “it is already dry”. The water that accumulated beneath the fabric will become breeding grounds for molds and bacteria, causing the funky smell.
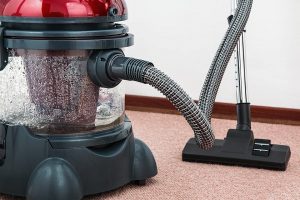 The best thing that you can do Fanny is either you vacuum your carpet thoroughly again and spray deodorizers with antibacterial components, or, you could get the service of a truly